|
This page will show you how to DIY a terminal into a MetriPack (or other type) of sealed connector. Most people don’t have the right crimper but you can do it if you can solder and work carefully. You’ll also need a wire stripper and needle nose pliers, tools that most people have around the shop. Practise first on some scrap wire and extra terminal!
The following photos show how to get two 14 gauge wires into one 12 gauge terminal. Some R/R unit have 4 output wires instead of just one ground and one positive output, they have a pair of each, of smaller gauge.
Users with one pair of 12 gauge outputs are lucky, but they still have to properly strip and solder their wires onto the MP280 (or any other) terminals. This is very important so that you do not get resistance which causes heat and power loss.
If you just have one wire per terminal, you can also see the tutorial for MetriPack 630 terminals further down this page. If you have a pair like shown here, marvel at the workmanship :-) You can do it too!
Pic 1 - the seal is in place and then the wires are stripped. You’ll need the larger blue seal for two 14 gauge wires.
Pic 2 - the wire tabs are bent to hold the wire strands (shown here they are crimped). The main thing is to capture all the wire strands. On this terminal there’s lots of space for a bulky pinch/solder as the connector opening is large. Use a pair of needle nosed pliers and holding the wire strands in place, bend the tabs to capture them enough so they won’t move. There’s no need of pinching them hard, you’ll likely distort the terminal. As you can see below, although these wires are fairly well crimped, the tabs were not large enough to really crimp them properly. Therefore they must be soldered.
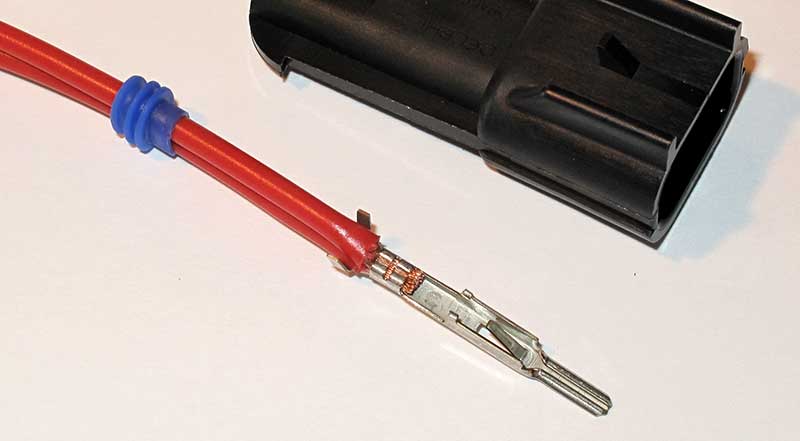 |
Pic 3 - The terminal has been soldered with the iron held down firmly on the end of the tabs/strands. I used a 70 watt soldering iron well heated, and 1 mm resin core electronics solder. This picture shows plenty of solder - do not overheat to melt the insulation. Do not use more solder than shown here. You can flux the terminal and wires first but only use resin type flux. On female terminals do not allow the solder to run up into the contact area. Be careful where you flux!
Pic 4- Slide the seal up into position and bend or crimp the ‘legs’ to hold the seal in place. Do not over-crimp or pinch too hard or you’ll split the seal. You just need to hold the seal well enough to stay in place when you insert it into the housing. Wait for the solder to completely cool before moving the seal into place. If you’re bending the legs with pliers, you want to shape them round before moving the seal into place.
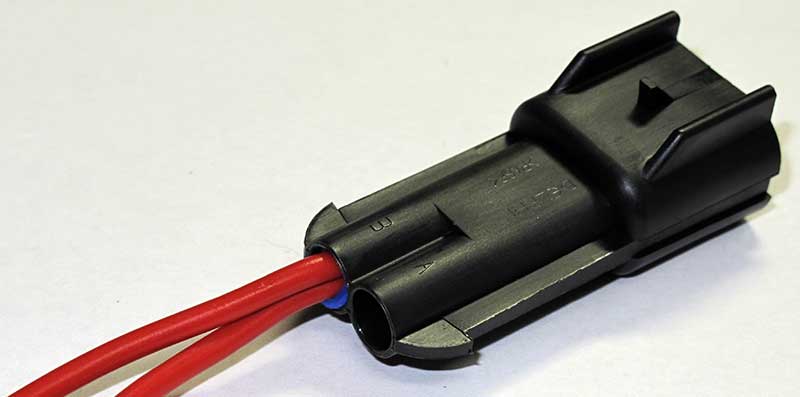
Pic 5 - here is the finished terminal inserted. With two wires it’s a tight fit but not that hard to do. The terminal as shown above is in the correct attitude to go into the connector as shown here.
 |
|
Single Wire per Terminal - MP 2P630 Male Shown (female at bottom of page) Note, that the female 2P MP630 is different in that the wires go through the housing then are crimped and pulled back into the housing.
|
|
|
|
|
|
|
|
|
|
|
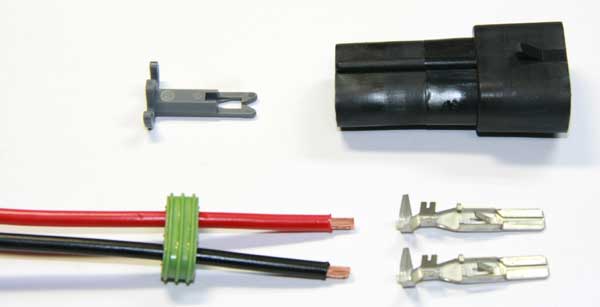
Start by putting the seal over both wires and stripping the wires 3/16” (5mm).
|
|
|
 |
|
|
|
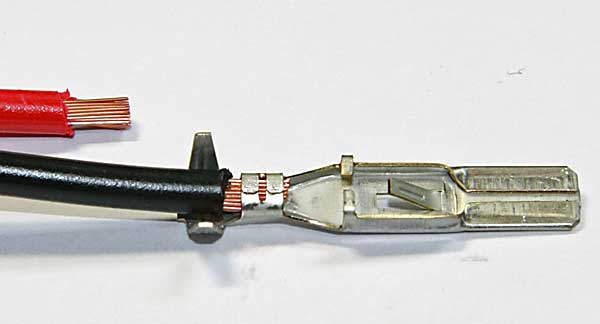
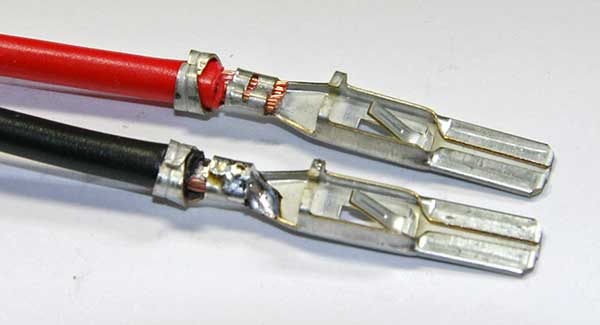
Now use needle nosed pliers to fold the tabs over the stripped wire strands. You don't have to pinch too tightly, just enough to keep the wire in place. The black wire below should be pushed in a bit further. Make sure some of the strands are past the tabs, but not too much. Finish one wire first to the end of step 3 and let cool, then do the other.
|
|
|
 |
|
|
|
Solder the wire and tabs. Keep the soldering iron away from the insulation. Here the bottom one is soldered, the top wire is crimped. After soldering allow to cool, then pinch the insulation tabs. No need of pinching too tight, just touching the insulation is fine. NOTE: If you're really good you can pre-solder (tin) the wire strands first. Shake off excess solder while hot, then pinch over tabs and solder again. This will make complete solder wicking quick and easy.
|
|
|
 |
|
|
|
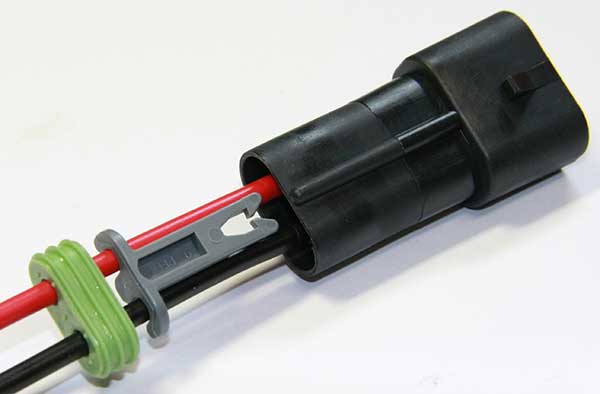
Push both terminals into the housing until they click. Make sure you have the red and black lined up with the female half's red and black wires! The retainer will push into place as shown. NOTE: Housing looks similar on both sides, but only one side has the locking tab. The retainer will be orientated correctly with the housing as shown below.
|
|
|
 |
|
|
|
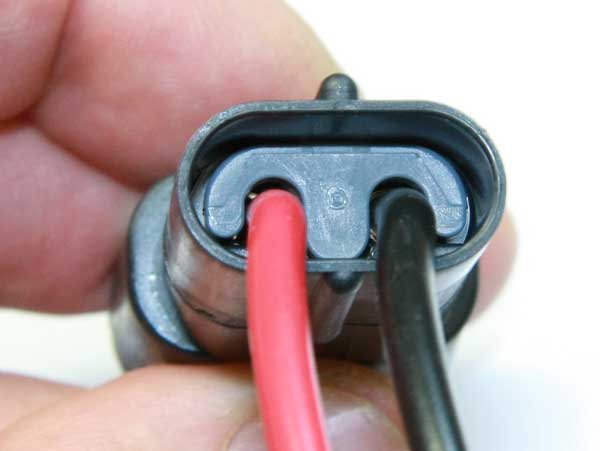
Here the retainer is pushed all the way in. It will take a bit bit of force to get started, then push in easily and lock in place.
|
|
|
 |
|
|
|
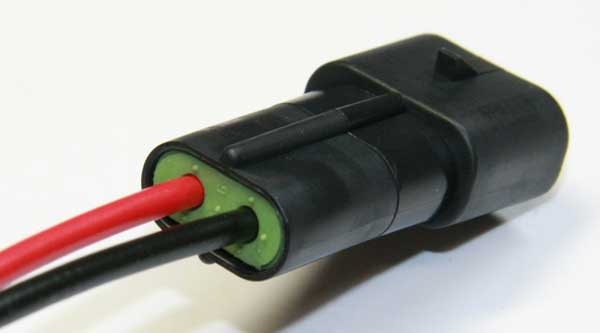
Push the seal in and you're done. You did put the seal over the wires first, right?
|
|
|
 |
|
|
MP 630 Fuseholder and 2P Connector Female
|
When installing the terminals on these, start by removing the rubber seal, then push it onto the wires.
Now put the wires through the housing and strip them as shown below.
Crimp on the terminals (or pinch and solder) and slide them back into the fuseholder (when cool).
Push the seal up into the housing, and you’re done.
|
|
|