|
Yamaha’s
MT-10/FZ-10 2016- -
PC-8 Fuse Panel Kit
Before on left and after PC-8 install on right. Removed 4
connections from battery post and still have 4 unused
outputs.

-
PC-8 Specifications and Features:
-
- 4 threaded insert nuts provide case mounting and fuse panel installation mounting points
-
- comes with an assortment of ATM fuses, one for each output circuit and a few extras
-
- 8 hot + outputs (2 unswitched circuits, 6 switched circuits)
-
- Switched circuits are turned off when the bike is shut down. An unswitched circuit is always hot - can be used for charging the battery
-
- 8 ground outputs - much better to ground your auxiliary circuits here than on a bike’s frame
-
- maximum fuse panel capacity 50 Amps (30A/20A - switched/unswitched)
-
- maximum circuit capacity 20 Amps (15A continuous)
-
- maximum output wire size 12 AWG (3 sqmm)
-
- all hardware is stainless steel (except input posts which are tin plated steel)
-
- black satin polycarbonate cover makes unit splash-proof yet allows it to breathe and stay cool
-
- cover mounting tabs on each end can be broken off or left on, depending on mounting choice
-
- simple robust design means no overheating and no problems with vibration
-
- I designed this fuse panel with ease of mounting a priority. Therefore there are many mounting options: Dual Lock on back of case, fine threaded screws from back of panel, self tapping screws from inside through PCB inserts to panel, or nuts and screws on the case mounting ears at each end of the case.
Complete plug and play kits, with all the wiring, a 40A relay, fuses, a PC-8 fuse panel, and more.
Battery Connect Complete Kit
|
MT-10 PC-8 Fuse Panel Kit $98.95
|
|
Installation Note: This kit uses the
number plate connector as a trigger for switched power. The kit was designed so that the PC-8 & Relay sit under the seat.
The relay sits foreword of the battery on the left and the
cables run to the PC-8 behind the battery. The switching
lead runs from the relay to near the tail light and connects
to the number plate light connector.
MT-10 Number Plate Splitter Cable ( OEM connectors )
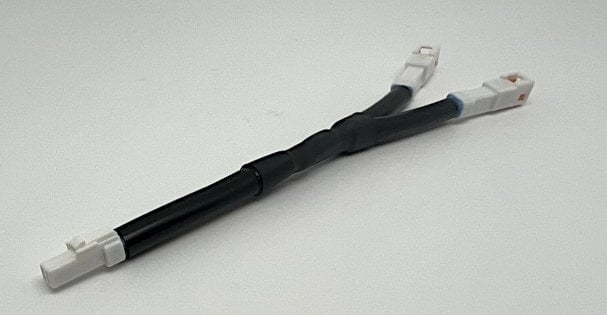 This cable splits your number plate light into two
output connectors for additional lights, or can be
used to power small power devices. |
|
Yamaha MT-10 Number Plate Splitter $23.95
|
|
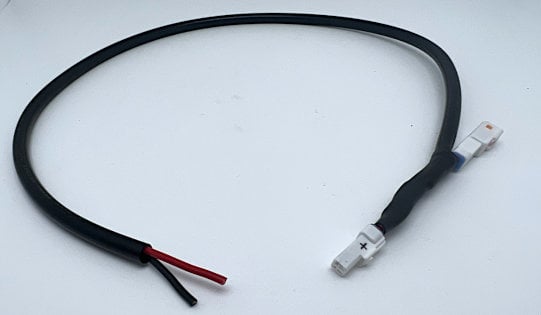
MT-10 Number Plate Light To Bullets Cable
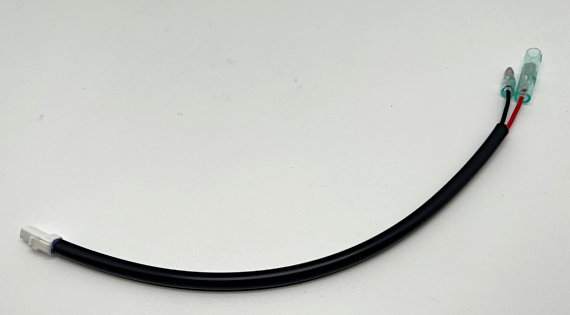 This cable allows you to install an aftermarket
number plate light or use it as a source of
switched power..
|
|
|
MT10 Number Plate to Bullets $15.95
|
|
|
|
MT-10 Number Plate Break Out Cable
|
 Plugs in series with your number plate light
connectors and provides a switched power source
for relays or fuse boxes or small power devices.
|
|
MT-10 Number Plate Break Out Cable $19.95
|
|
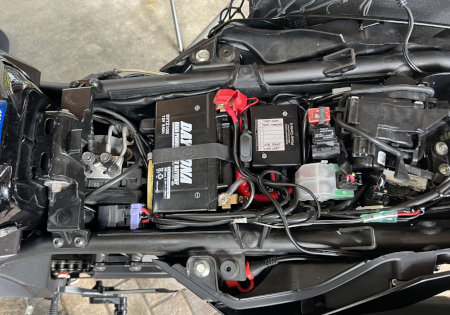
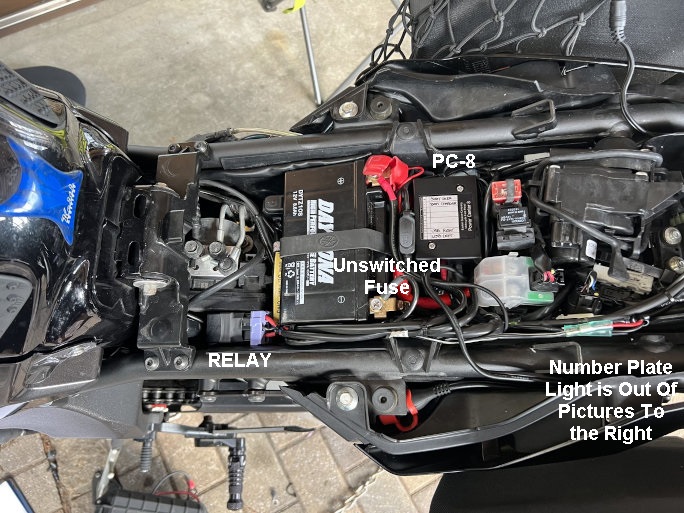
PC-8 Installation Info
There is not a lot of space under the seat of the MT-10.
However, there is enough to install a PC-8 fuse panel to
tidy up your wiring. This kit is plug and play. No cutting
or tapping of wires. Do not install any fuses until all
electrical connections are made. Ensure the bike ignition is
turned off. When connecting to the battery, disconnect the
negative terminal first and install it last. Do not allow
the bike main power cables to make intermittent contact with
the battery, so hold the cable against the battery terminal
until the screw is removed and then cleanly disconnect.
Similarly when installing. The kit main relay sits forward
of the battery on the left. The PC-8 sits behind the
battery. The switched control lead routes down the left side
of the seat sub-frame to connect to the number plate light
connector ( not shown in this picture, as this bike had been
modified by it's previous owner ). Cable tie wires into
position. The install took about 20 minutes to complete and
test that everything was working.
|