PC-8 Specifications and Features: – 4 threaded insert nuts provide case mounting and fuse panel installation mounting points – comes with an assortment of ATM fuses, one for each output circuit and a few extras – 8 hot + outputs (2 unswitched circuits, 6 switched circuits) – Switched circuits are off when the bike is shut down. An unswitched circuit is always hot – can be used for charging the battery – 8 ground outputs – much better to ground your auxiliary circuits here than on a bike’s frame – maximum fuse panel capacity 50 Amps (30A/20A – switched/unswitched) – maximum circuit capacity 20 Amps (15A continuous) – maximum output wire size 12 AWG (3 sqmm) – all hardware is stainless steel (except input posts which are tin plated steel) – black satin polycarbonate cover makes unit splash-proof yet allows it to breathe and stay cool – cover mounting tabs on each end can be broken off or left on, depending on mounting choice – simple robust design means no overheating and no problems with vibration – We designed this fuse panel with ease of mounting a priority. Therefore there are many mounting options: Dual Lock on back of case, fine threaded screws from back of panel, self tapping screws from inside through PCB inserts to panel, or nuts and screws on the case mounting ears at each end of the case.
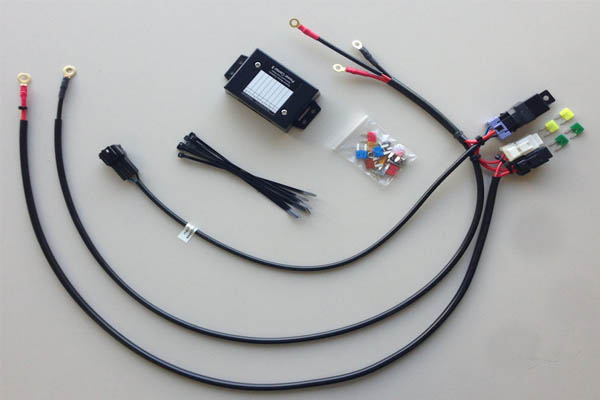
Complete plug and play kits, with all the wiring, a 50A relay, fuses, a PC-8 fuse panel, and more. This superb fuse panel is full of all the features every rider has ever wanted and more! Easy to install, well protected, and with 8 mini fuses, one on each output circuit. Includes 8 output grounds too. Kit is made from highest quality high temp wire and sheathing. This Kit is custom made for the new Africa Twin and is plug and play. Everything you need is included. Just strip your circuit wires and insert into the PC-8 outputs and tighten the screws. Both power and ground terminal blocks are built in. This Kit is now 50A capable using dual main fuse holders. The black fuse holder (30A max) serves 6 switched circuits, the white fuse holder (20A max) serves the 2 unswitched circuits.
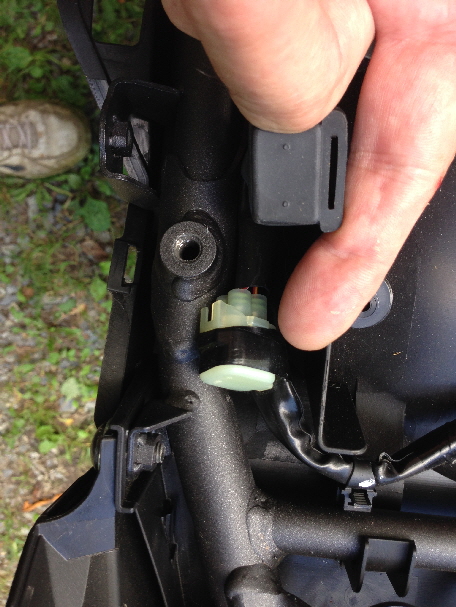
Please Note – all CRF1000 PC8 and 4CS Kits now use the 6P connector found at far rear left under passenger seat. If your bike has a factory alarm system (or anything else plugged into this connector) you will also need the Rear Acessory Splitter with this Kit. A longer kit is available to mount the PC-8 in the far back of the under seat area. It is 8 inches longer than the regular Kit.
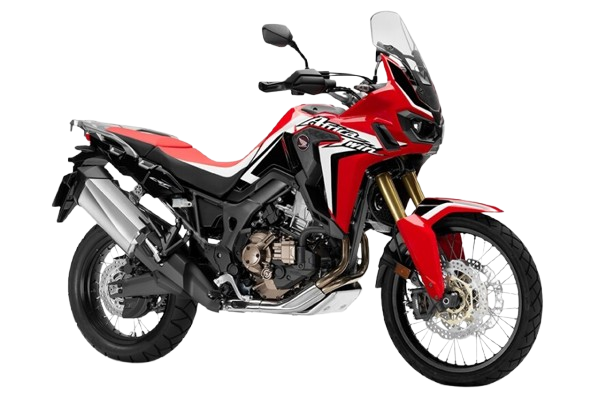
CRF1000L PC-8 Fuse Box Kit
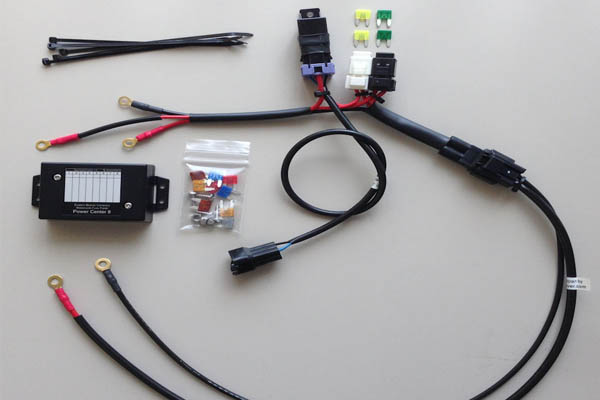
Accessory fuse box for the CRF1000L. 50Amp rated. 6 swithed and 2 battery direct connections. Simple plug and play installation. Note if the under seat 6 pin aux connection is used ( alarms ) then you will need a splitter. The PowerLink version provides a PowerLink ( high power ) connection under the seat for jump starting & easy disconnection of all accessories ( if Battey is weak for starting ).
$109.95–$130.95Price range: $109.95 through $130.95
CRF1000L PC-8 – [Wiring Kit Only]
Plug & Play wiring kit for the PC-8. For those moving a PC-8 from their old bike to a Honda CRF1000L. Saves you having to purchase another PC-8 unit. A great feature of the PC-8 is that it is built to last, and is easily moved from one bike to another by purchasing the wiring kit for your new bike.
$49.95–$70.95Price range: $49.95 through $70.95
Dual Lock Super Stong Velcro 2 Pieces
Super strong 3M dual lock velcro. Clean surfaces before installing. Great for fixing the PC-8 or PC-8R to plastic surfaces.
$6.95
SAE Cable – 16 AWG Stripped Ends to SAE
SAE to bare wire ends. 72″ or 1.8m long. 16AWG lead length. Can be connected to the PC-8 or PC-8R for battery charger or heated gear connections.
$13.95
PowerLink Explained
PowerLink is basically a high current connection in the battery connection lead. It allows you to use our PowerLink accessory cables and adapters. For example, there is the PowerLink Jump Start cable, which can be plugged into the PowerLink battery connection to jump start the bike. The PowerLink connection, on the accessory fuse box, allows you to quickly disconnect all accessories. Say, when your battery is a little weak, on a cold morning. You can also connect high power horn kits or air compressors. Basically its an easy access point to your battery for higher current use.
Battery direct connection is the standard connection method. Available in two length. Standard mounts the PC-8 under the riders seat. Long mounts the PC-8 under the pillion seat.
The PowerLink option provides a single point where you can disconnect all your accessories ( very useful if your battery is having power starting the bike ). It also allows you to connect our PowerLink jumper cable, available separately. Some customers have adapted their lithium jump start packs to connector to the PowerLink connection.
This Kit is custom made for the new Africa Twin and is plug and play. Everything you need is included. Just strip your circuit wires and insert into the PC-8 outputs and tighten the screws. Both power and ground terminal blocks are built in.
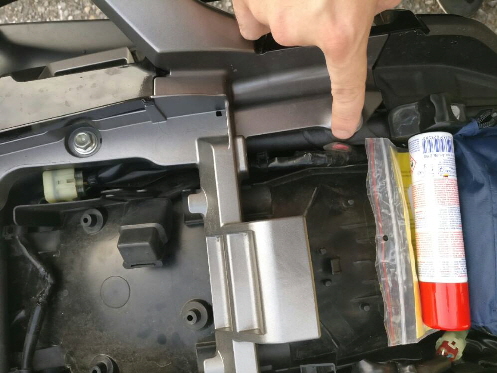
To install this Kit you need to remove the left side tank side trim, and pull the battery out half way. Wires are easy to route to the battery and when you’re finished, everything will look built into the bike. You should be able to locate the PC-8 just about anywhere under the seat. Install the main fuses after complete installation. A longer kit is available to mount the PC-8 in the far back of the under seat area. It is 8 inches longer than the regular Kit.
PC-8 Kit Switching Connector for CRF1000
UPDATE: For customers who have an alarm installed or are already using the accessory connector for other purposes, we can supply the PC-8 Kit with a switching connector that uses the rear tail light connection ( found under the passengers seat, a white 2-pin connector ). Please leave a note with your Paypal order. We cannot change switching connectors once the order has been received.
Please Note – all CRF1000 PC8 and 3CS Kits now use the 6P connector found at far rear left under passenger seat. Slice the tape to free the connector, then remove the cap.
You can move it further forward to be accessible under the rider’s seat. Move it to a position shown by the finger below.